Package content

Basic information
C6NP Wifi Camera

DESCRIPTION
Led Indicator
- Solid red – Camera is starting up.
- Red flashing slowly: error connecting to wifi network.
- Red flashing quickly: camera exception (eg microSD card error).
- Blue flashing rapidly: the camera is ready to connect to the Wi-Fi network.
- Slow blinking blue: camera is working properly.
MicroSD card (sold separately)
- Initialize the card in the MIRU365 app before using it.
Reset button
- Press and hold for 5 seconds to reset and restore all parameters to default values.
Microphone
- Audio input
Speaker
- Audio output

Instalation
1- Switched on
Connect the power cord to the camera, and then plug the power adapter into an electrical outlet as shown in the following figure.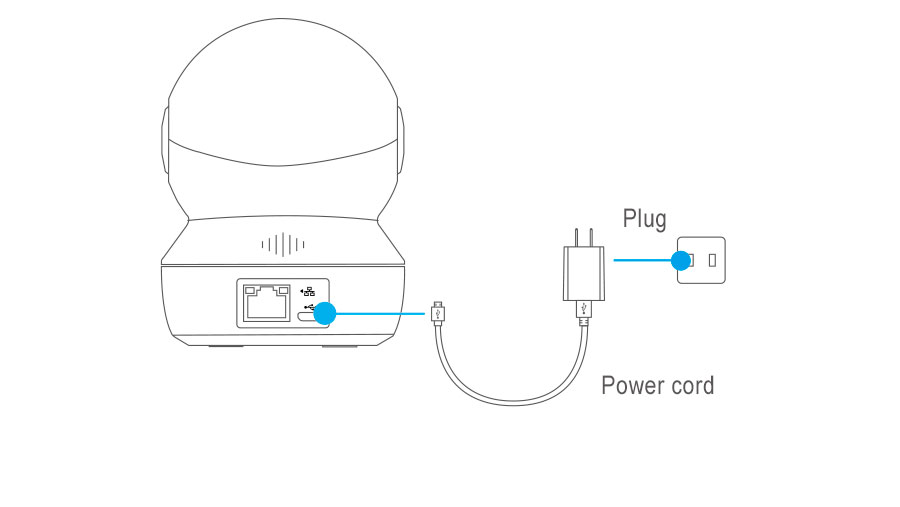
The LED flashing rapidly in blue indicates that the camera is on and ready to configure the Wi-Fi network.
2- Camera Settings
1-Create a user account
- Connect the mobile phone to a Wi-Fi network using your 2.4 GHz network.
- Search for “MIRU365” in the App Store or Google Play (TM).
- Download and install the MIRU365 application.
- Launch the application Create and register a MIRU365 user account by following the instructions in the startup wizard.
2-Add a camera to MIRU365
- Log into your account with the MIRU365 app.
- On the home screen, press “+” in the upper right corner to enter the QR code scanning interface.
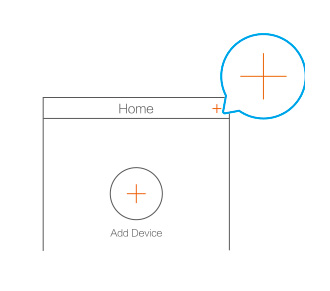
- Scan the QR code on the bottom of the camera.
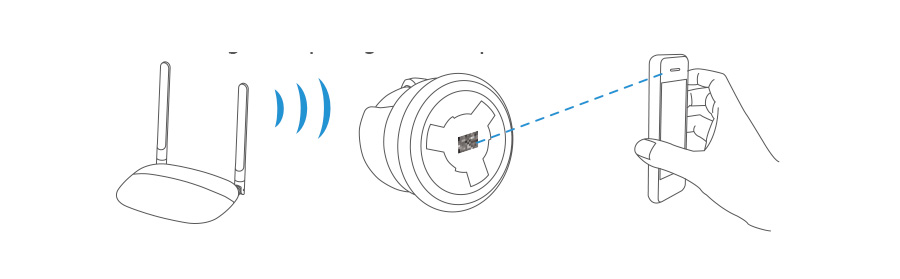
Follow the directions of the MIRU365 application wizard to finish the Wi-Fi connection setup.
Press and hold the Reset button for 5 s in any of the following cases:
• The camera cannot connect to your Wi-Fi network.
• You want to select another Wi-Fi network.
Installation (optional)
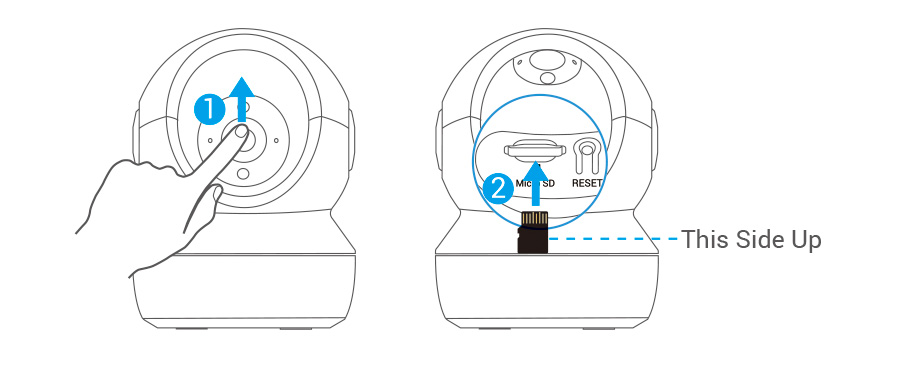
1- Inserting the microSD card (optional)
- Rotate the dial up until you see the card slot.
- Insert the microSD card (sold separately) into the card slot as shown in the figure below.
- In the MIRU365 application, press “ Storage Status ” found in the device configuration interface to check the status of the SD card.
- If the status of the memory card appears as “ Uninitialized ” ( not initialized ), press to initialize it.
Then, the status will change to Normal and videos and / or images can be stored.
2- Base Installation
The camera can be positioned horizontally or installed on the ceiling.
Here, we refer to the ceiling installation as an example.
- Make sure the ceiling is strong enough to support three times the weight of the camera.
- Avoid placing the camera in an area where the lens receives too much light directly.
- Place the drilling template on the surface chosen for mounting the camera.
- (Only for mounting on concrete walls / ceilings). Drill the screw holes according to the template and insert the three dowels.
- Use three metal screws to fix the camera base according to the template.
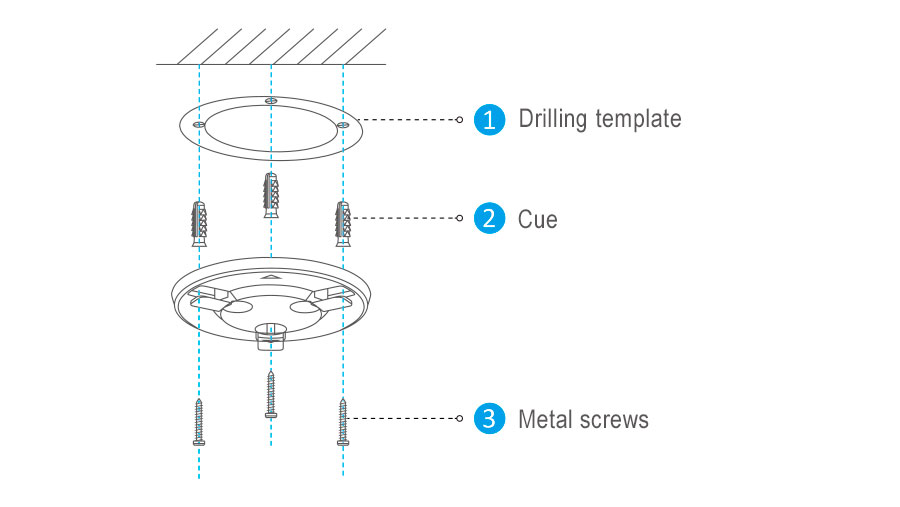
After the base is installed, peel off the drilling template if necessary.
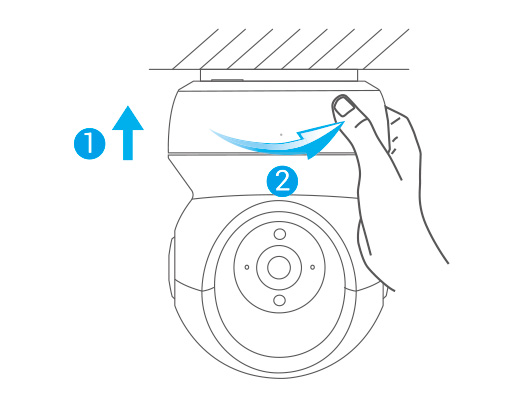
3- Camera installation
Mount the camera on the base and rotate it clockwise until secure.
Once the camera is installed, access the MIRU365 application to flip the camera image.